Node.js Explained – A Practical Introduction to Node for JavaScript Developers
Node.js is a runtime environment for executing JavaScript outside the web browser. It makes JavaScript usable in contexts beyond just web pages.
Node.js is not a framework or language. Instead, it is an asynchronous, event-driven environment that includes tools such as:
- JavaScript engine (Google’s V8)
- Module system (CommonJS and ES Modules)
- Operating system APIs (
os) - Filesystem access (
fs) - Network servers (
http,net,https) - Memory management tools
- Event loop
These components make up Node.js’s core infrastructure, enabling JavaScript to run outside of browsers.
This tutorial will help you understand Node.js’s purpose by guiding you through a basic application setup. Let’s begin with installing Node.js.
How to Install Node.js on Your System
Section titled “How to Install Node.js on Your System”The first step to creating a Node.js application is to have Node on your system. So, go to the Node.js website and install the latest LTS (Long Term Support) version.
After installation, run the following command in your terminal to display the Node.js version installed on your system.
node -vOnce you’ve successfully installed Node.js on your system, we can proceed to create the project directory.
How to Create a New Directory for Your Project
Section titled “How to Create a New Directory for Your Project”Use the mkdir CLI command to create a new project directory as follows:
mkdir codesweetly-nodejs-app-001Afterward, navigate to your project directory using the command line.
cd path/to/mkdir codesweetly-nodejs-app-001Create a package.json File
Section titled “Create a package.json File”Use NPM to initialize a package.json file after navigating into the project directory.
npm init -yNext, open the package.json file and delete the main field.
Why Node.js
Section titled “Why Node.js”Originally, developers could run JavaScript code only inside web browsers because that was the only environment with the infrastructure to execute JavaScript.
Node’s 2009 release enabled running JavaScript outside the web browser. For example, let’s create a script to run from our system’s terminal.
1. Create a JavaScript file
Section titled “1. Create a JavaScript file”Create the JavaScript file you want Node to run:
touch console.js2. Write your JavaScript program
Section titled “2. Write your JavaScript program”Open the newly created JavaScript file and write your program:
console.log("=== Hello from the CodeSweetly Team! ===");console.log("We hope you have fun Coding Sweetly with Node.js.");console.log("Thank you for being part of the CodeSweetly community.");console.log("=== Keep coding. Keep creating. Keep shipping. ===");3. Run your JavaScript program
Section titled “3. Run your JavaScript program”Node.js provides the global node command for running a Node application from your command line.
node console.jsnode: The global command for running a Node.js server.console.js: The JavaScript file you want Node to run.
You can also add the command to the "scripts" field of your project’s package.json file:
{ "scripts": { "start": "node console.js", "test": "echo \"Error: no test specified\" && exit 1" }}By so doing, you can run your JavaScript program from your terminal like this:
npm run startOnce you execute your script, Node will print the file’s output to your terminal. It will look like this:
$ npm run start
> codesweetly-nodejs-app-001@1.0.0 start> node console.js
=== Hello from the CodeSweetly Team! ===We hope you have fun Coding Sweetly with Node.js.Thank you for being part of the CodeSweetly community.=== Keep coding. Keep creating. Keep shipping. ===
As you can see, we’ve successfully executed JavaScript outside a web browser. That’s precisely what Node.js helps us with. It is an asynchronous, event-driven runtime environment for running JavaScript code outside the web browser. You can also automate rerunning your program. Let’s discuss how.
4. Automatically rerun your JavaScript program
Section titled “4. Automatically rerun your JavaScript program”By default, Node.js requires you to manually rerun your JavaScript file each time you make changes.
Repeating the manual process of executing your application as you make changes can be burdensome. Luckily, Node provides the --watch flag for automating the process:
node --watch filename.extensionThe snippet above uses the --watch flag to start Node.js in watch mode. This causes Node to re-execute the specified script whenever you update any of the files in its dependency graph.
node: The command for running Node.js scripts or the REPL.--watch: The flag for activating Node’s watch mode.filename.extension: The script you want Node to execute.
The --watch flag, by default, watches the entry point and all the modules it depends on. In other words, the watch command causes Node to monitor:
- The entry file (
filename.extension) - All files imported by the entry file
- All files imported in those imports
- And so on through the whole dependency graph
Node does not automatically watch files unless they are imported somewhere in the entry point’s dependency graph. If you want Node to watch other files, use the --watch-path flag:
node --watch-path=./src --watch-path=./tests filename.extensionThe --watch-path flag, in the snippet above, tells Node to watch all files in the src and tests directories, even if they are not in the entry point’s dependency graph.
node: The command for running Node.js scripts or the REPL.--watch-path: The flag for specifying the path you want Node to watch for changes.filename.extension: The script you want Node to execute.
Node.js supports two module systems. Let’s learn about them.
Node’s Module Support
Section titled “Node’s Module Support”Node.js supports both CommonJS (.cjs) and ECMAScript (.mjs) modules. This allows you to use your preferred module type to create Node.js applications.
For example, below is a script.mjs JavaScript file. Node will treat it as an ECMAScript module because it has a .mjs file extension.
import http from "node:http";On the other hand, Node will regard the script.cjs JavaScript file below as a CommonJS module because it has a .cjs file extension.
const http = require("node:http");Suppose you want to use a specific module type for all the JavaScript files in your project. In that case, specify a type field in your package.json file like so:
{ "scripts": { "start": "node console.js", "test": "echo \"Error: no test specified\" && exit 1" }, "type": "module"}The "type": "module" field, in the snippet above, specifies that all JavaScript (.js) files in the project are ES Modules.
Set the "type" field to "commonjs" to make Node treat all .js files as CommonJS.
Some notes:
- The ES module system is the official standard for JavaScript.
- Kevin Dangoor started CommonJS in January 2009, when JavaScript lacked a standardized module system.
- Since the ES module’s appearance in the 2015 ECMAScript standard, the previous module systems, including CommonJS, have gradually become part of JavaScript’s history.
In this tutorial, we’ll mainly use Node.js with ES Modules, since ES Modules is JavaScript’s standard. When relevant, we’ll compare CommonJS syntax.
Let’s now discuss using Node.js to create web servers that receive and respond to connections from browsers.
How to Create HTTP Servers with Node.js
Section titled “How to Create HTTP Servers with Node.js”An HTTP server lets your JavaScript application handle client (browser) requests and send responses.
There are three main steps to configuring an app’s HTTP server:
- Create a new instance of the HTTP
Serverobject. - Specify the system’s port where you want the server to run.
- Define how the server should respond to client requests.
Let’s discuss the three steps in detail. To start, create an ES Module for your project.
touch server.jsAfterward, open the newly created module and initialize a new instance of the HTTP Server object.
How to initialize a new instance of the HTTP Server object
Section titled “How to initialize a new instance of the HTTP Server object”Node provides the createServer method for creating an instance of the HTTP Server Object (http.Server).
You can use it in your project by importing it from Node’s http module as follows:
import { createServer } from "node:http";
const server = createServer();
Here’s what’s going on:
importstatement: Imports thecreateServerAPI from Node’shttplibrary to theserver.jsES Module.server: A variable for storing the HTTPServerobject that thecreateServer()function outputs.
Here’s the CommonJS alternative:
const http = require("node:http");
const server = http.createServer();
Once you have created the local HTTP Server object, specify the server’s port.
How to specify the system’s port where the server should run
Section titled “How to specify the system’s port where the server should run”The HTTP Server object provides a listen() method to configure the port on which the server should run and accept client requests.
Syntax
Section titled “Syntax”import { createServer } from "node:http";
const server = createServer();
server.listen(port, hostname, backlog, callback);The listen() method accepts four optional arguments:
port: (number) The port number where the server should run and listen for client requests. If omitted, the operating system will assign any unused port. You can useserver.address().portto retrieve the port the server is listening on after it starts listening for client connections.hostname: (string) The IP address where the server should accept client requests. If omitted, the server will default to either an unspecified IPv6 (::) address or an IPv4 (0.0.0.0) address (0.0.0.0). You can useserver.address().addressto retrieve the hostname the server uses once it starts listening for client connections.backlog: (number) Maximum length of the pending connections’ queue. 511 is the default value.callback: (function) The function to execute once the server starts listening for client requests.
Example
Section titled “Example”import { createServer } from "node:http";
const server = createServer();server.listen(3000, "127.0.0.1", 511, () => { const info = server.address(); console.log(`Server running at http://${info.address}:${info.port}/`);});Here’s what’s going on:
importstatement: Imports thecreateServerAPI from Node’shttplibrary to theserver.jsES Module.server: A variable for storing the HTTPServerobject that thecreateServer()function outputs.server.listen(): Starts the server to listen for client connections. (Tip: The method emits alisteningevent once the server starts successfully.)
Here’s the CommonJS alternative:
const http = require("node:http");
const server = http.createServer();server.listen(3000, "127.0.0.1", 511, () => {  const info = server.address();  console.log(`Server running at http://${info.address}:${info.port}/`);});
What is the 127.0.0.1 hostname?
Section titled “What is the 127.0.0.1 hostname?”The 127.0.0.1 hostname is the IP address of the localhost (the local computer on which your application is currently running). So, the previous snippet is equivalent to the following:
import { createServer } from "node:http";
const server = createServer();server.listen(3000, "localhost", 511, () => {  console.log(`Server running at http://localhost:3000/`);});
Currently, if you visit your server’s web address, you will see nothing because we have not yet set up responses to client requests. Let’s configure that now.
How to configure the server to respond to client requests
Section titled “How to configure the server to respond to client requests”The createServer() method accepts a requestListener callback that is invoked automatically whenever the server receives a client connection. Node allows you to use this callback to respond to requests.
Syntax
Section titled “Syntax”The createServer() method accepts two optional arguments. Here’s the syntax:
import { createServer } from "node:http";
const server = createServer(options, callback);options: An object for customizing the server’s behavior.callback: TherequestListenerfunction for handling and responding to client requests. It accepts two parameters:
import { createServer } from "node:http";
const server = createServer(options, function (request, response) { // the `requestListener` function's body});requestparameter: Anhttp.IncomingMessageobject that provides details about the client request.responseparameter: Anhttp.ServerResponseobject for responding to the client requests.
Providing the requestListener callback function as createServer’s second argument causes Node.js to automatically add it to the "request" event. So, the syntax above is equivalent to:
import { createServer } from "node:http";
const server = createServer(options);
server.on("request", function (request, response) {  // the `requestListener` function's body});
The server.on("request", callback) tells the server to listen for a request event and execute the callback on such an event.
Example
Section titled “Example”// Add the Node.js HTTP module:import { createServer } from "node:http";
// Specify the hostname and port to run the server:const hostname = "localhost";const port = 3000;
// Create a new Server instance with a requestListener callback:const server = createServer((req, res) => { res.statusCode = 200; // Set an OK success (200) response status code. res.setHeader("Content-Type", "text/plain"); // Define the media type of the response data. res.end("Hello World!"); // Specify the response data and close the response stream.});
// Run the server on the specified port and hostname:server.listen(port, hostname, () => { console.log(`Server running at http://${hostname}:${port}/`);});The snippet above used the requestListener callback function’s response parameter to configure the server to respond to client requests. Here’s the server.on("request", callback) alternative:
// Add the Node.js HTTP module:import { createServer } from "node:http";
// Specify the hostname and port to run the server:const hostname = "localhost";const port = 3000;
// Create a new Server instance:const server = createServer();
// Listen for a request event and execute the requestListener callbackserver.on("request", (req, res) => {  res.statusCode = 200; // Set an OK success (200) response status code.  res.setHeader("Content-Type", "text/plain"); // Define the media type of the response data.  res.end("Hello World!"); // Specify the response data and close the response stream.});
// Run the server on the specified port and hostname:server.listen(port, hostname, () => {  console.log(`Server running at http://${hostname}:${port}/`);});
Now that your server is set up and the port configured, you can run the application.
node server.jsnode: The global command for running a Node.js server.server.js: The JavaScript file you want Node to run.
While the server is running, if users request the app’s resource at the server’s web address, they will see a Hello World! response.
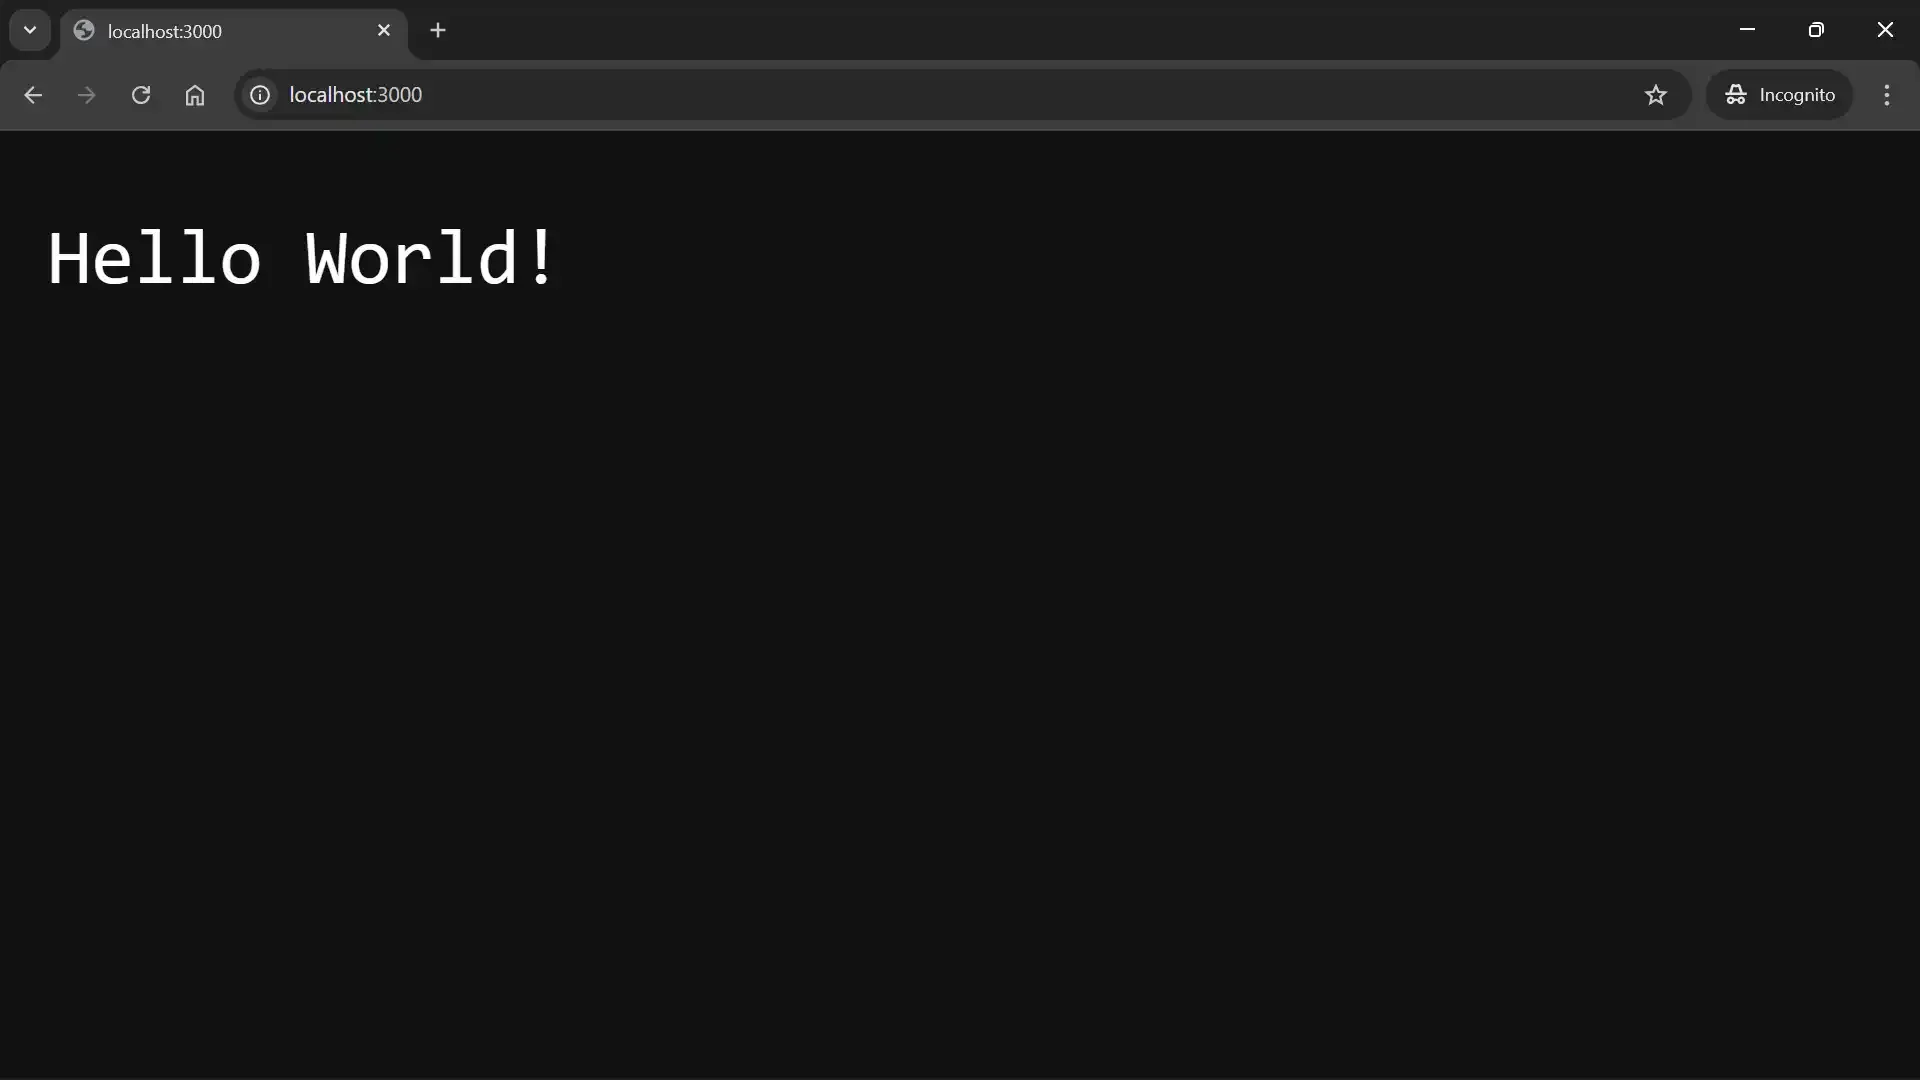
A Node.js server uses the requestListener callback to respond to client
requests.
Let’s now discuss some of the http.ServerResponse object’s APIs you can use to respond to HTTP requests.
The http.ServerResponse APIs
Section titled “The http.ServerResponse APIs”Below are some of the ServerResponse APIs for responding to client requests.
response.statusCode
Section titled “response.statusCode”The response.statusCode property is the status code that the Node.js server sends to the client when it calls writeHead() or end().
Syntax
Section titled “Syntax”import { createServer } from "node:http";
createServer((request, response) => { response.statusCode = <number>;});<number> is the status code value you want to send to the client. It typically falls within one of the following categories:
- 100 – 199: Informational responses
- 200 – 299: Successful responses
- 300 – 399: Redirection messages
- 400 – 499: Client error responses
- 500 – 599: Server error responses
200 is the default response status code.
Example
Section titled “Example”import { createServer } from "node:http";
const server = createServer((req, res) => { res.statusCode = 200; // Set 200 response status code. res.end(`${res.statusCode}`); // Use the status code as the response data.});
server.listen(8000, () => { console.log(`Server running at http://localhost:8000/`);});The snippet above uses res.statusCode to set the response’s status code to 200 (success).
response.statusMessage
Section titled “response.statusMessage”The response.statusMessage property sets the human-readable status message that the Node.js server sends to the client when it calls writeHead() or end().
Syntax
Section titled “Syntax”import { createServer } from "node:http";
createServer((request, response) => { response.statusMessage = <string>;});<string> is the message you want to send to the client. undefined is the default, which makes Node default to the status code’s standard message if you do not define a statusMessage.
Example
Section titled “Example”import { createServer } from "node:http";
const server = createServer((req, res) => { res.statusCode = 404; res.statusMessage = "Sorry, page not found"; // Set a response message res.end(`${res.statusMessage}`); // Use the status message as the response data});
server.listen(8000, () => { console.log(`Server running at http://localhost:8000/`);});The snippet above uses res.statusMessage to set a human-readable status message for the server response’s status code.
response.setHeader
Section titled “response.setHeader”The response.setHeader() method sets the HTTP response header that the Node.js server sends to the client when it calls writeHead() or end().
Syntax
Section titled “Syntax”import { createServer } from "node:http";
const server = createServer((request, response) => { response.setHeader("Header-Name", "header-value");});You can also use an array to define multiple values for a single header:
import { createServer } from "node:http";
const server = createServer((request, response) => { response.setHeader("Header-Name", ["value1", "value2", "value3"]);});Example
Section titled “Example”import { createServer } from "node:http";
const server = createServer((req, res) => { res.setHeader("Content-Type", "text/html"); // Set the response header's content type. res.end(`${res.getHeader("Content-Type")}`); // Use the content type's value as the response data.});
server.listen(8000, () => { console.log(`Server running at http://localhost:8000/`);});The snippet above uses res.setHeader to set the header that the server sends to the client in response to the client’s request. The value can also be an array:
import { createServer } from "node:http";
const server = createServer((req, res) => {  res.setHeader("Cookie", ["name=codesweetly", "age=5"]); // Set the response header's content type.  res.end(`${res.getHeader("Cookie")}`); // Use the cookie's value as the response data.});
server.listen(8000, () => { console.log(`Server running at http://localhost:8000/`);});response.writeHead
Section titled “response.writeHead”The response.writeHead() method sets the HTTP response’s status code, status message (optional), and headers that the Node.js server will send to the client.
Syntax
Section titled “Syntax”import { createServer } from "node:http";
createServer((request, response) => { response.writeHead(statusCode, statusMessage, headers);});statusCode: A 3-digit number representing the HTTP response’s status code that the Node.js server will send to the client.statusMessage: An optional string representing the human-readable status message that the Node.js server will send to the client. If omitted, Node will use thestatusCode’s default message.headers: An object or array representing the HTTP response headers that the server will send to the client. If you use an array, Node will interpret the even-numbered indices as header names and the odd-numbered indices as header values.
Example
Section titled “Example”import { createServer } from "node:http";
const server = createServer((req, res) => { res .writeHead(200, "OK", { "Content-Type": "text/plain", "CodeSweetly-Header": "simplified/tutorials", "Your-Custom-Header": "your-custom-value", }) .end("Hello from CodeSweetly's Server!");});
server.listen(8000, () => { console.log(`Server running at http://localhost:8000/`);});The snippet above uses writeHead to send three headers to the client. We also chained an end() method to the ServerResponse object returned by writeHead().
Here’s the array equivalent of the headers argument:
import { createServer } from "node:http";
const server = createServer((req, res) => {  res    .writeHead(200, "OK", [      "Content-Type",      "text/plain",      "CodeSweetly-Header",      "simplified/tutorials",      "Your-Custom-Header",      "your-custom-value",    ])    .end("Hello from CodeSweetly's Server!");});
server.listen(8000, () => {  console.log(`Server running at http://localhost:8000/`);});
Let’s now discuss the difference between writeHead(), statusCode, setHeader, and statusMessage.
writeHead() vs. statusCode vs. statusMessage vs. setHeader()
Section titled “writeHead() vs. statusCode vs. statusMessage vs. setHeader()”The writeHead() method explicitly sets three HTTP responses at once. Here’s how it works differently from the implicit alternatives.
Data type
Section titled “Data type”writeHead(): A method of thehttp.ServerResponseobjectstatusCode: A property of thehttp.ServerResponseobjectstatusMessage: A property of thehttp.ServerResponseobjectsetHeader(): A method of thehttp.ServerResponseobject
Purpose
Section titled “Purpose”writeHead(): Sets the response’s status code, status message (optional), and headers.statusCode: Sets (or gets) the response’s status code.statusMessage: Sets (or gets) the response’s status message.setHeader(): Sets the response’s header. (You can usegetHeader()to retrieve the header.)
Timing
Section titled “Timing”writeHead(): Explicitly sets and sends responses immediately without predefining them.statusCode: Predefine the response status code that the server will send during awriteHead()orend()call.statusMessage: Predefine the response status message that the server will send during awriteHead()orend()call.setHeader(): Predefine the response header that the server will send during awriteHead()orend()call.
Recallability
Section titled “Recallability”Node allows calling statusCode, statusMessage, and setHeader() multiple times in a response cycle. The latest definition will override the previous ones.
On the other hand, you can call writeHead() only once in a response cycle because Node will send the headers to the client immediately when it executes the function.
Precedence
Section titled “Precedence”The writeHead() method’s arguments take precedence over statusCode, statusMessage, and setHeader().
Caching
Section titled “Caching”writeHead() sends its response to the client without saving it internally. But statusCode, statusMessage, and setHeader() cache their responses for future retrieval and modification.
response.write
Section titled “response.write”The response.write() method sends a chunk (portion) of the HTTP response body to the client. In other words, rather than sending data at once, write() sends them in chunks. It is an efficient way to stream or send large amounts of data.
Syntax
Section titled “Syntax”import { createServer } from "node:http";
createServer((request, response) => { response.write(chunk, encoding, callback);});chunk: A string, buffer, or Uint8Array representing the portion of the HTTP body you want to send to the client.encoding: An optional string specifying how Node should encode a string chunk into a byte stream."utf8"is the default value.callback: An optional function, which Node will call when it sends the chunk of data to the client.
Example
Section titled “Example”import { createServer } from "node:http";
const server = createServer((req, res) => { res.writeHead(200, "OK", { "Content-Type": "text/plain" }); res.write("First chunk"); res.write(" | Second chunk"); res.write(" | Third chunk"); res.end();});
server.listen(8000, () => { console.log(`Server running at http://localhost:8000/`);});The snippet above uses write() to send three chunks of body data to the client.
response.end
Section titled “response.end”The response.end() method completes the response to an HTTP request. It signals to Node that you’ve finished sending all response headers and the body to the client. It is essential to always use this method to complete (terminate) the stream so that Node can properly flush all data and release the underlying resources.
Syntax
Section titled “Syntax”import { createServer } from "node:http";
createServer((request, response) => { response.end(chunk, encoding, callback);});chunk: An optional string, buffer, or Uint8Array representing the portion of the HTTP body you want to send to the client before ending the stream. If specified, it is equivalent to callingresponse.write(chunk)followed byresponse.end().encoding: An optional string specifying how Node should encode a string chunk into a byte stream."utf8"is the default value.callback: An optional function, which Node will call when the data streaming ends.
Example: Use the end() method to finish streaming data to an HTTP client
Section titled “Example: Use the end() method to finish streaming data to an HTTP client”import { createServer } from "node:http";
const server = createServer((request, response) => { response.writeHead(200, "OK", { "Content-Type": "text/plain" }); response.write("First chunk\n"); response.write(" | Second chunk\n"); response.write(" | Third chunk\n"); response.end(" | Last data chunk.", "utf8", () => { console.log("Data streaming completed! All data has been sent."); });});
server.listen(8000, () => { console.log(`Server running at http://localhost:8000/`);});The snippet above uses the end() method to properly end data streaming to the client.
Before we wrap up our discussion, let’s recap what Node.js is.
Node.js Is a Non-Browser Environment for Creating a Wide Variety of Applications and Tools
Section titled “Node.js Is a Non-Browser Environment for Creating a Wide Variety of Applications and Tools”Node.js is not just for creating web servers. You can use it for a wide variety of projects, such as:
- Command Line Developer Tools
- Web Application
- Script Automation
- Script Deployment
- File System Tools
For example, the snippet below uses Node’s createWriteStream API to write data to a file.
import { createWriteStream } from "node:fs";
const myWritableStream = createWriteStream("myOutputfile.txt");
myWritableStream.write("First data chunk.\n");myWritableStream.write(" | Second data chunk.\n");myWritableStream.write(" | Third data chunk.\n");myWritableStream.end(" | Last data chunk.", "utf8", () => {  console.log("Success! The data streaming has ended.");});
Some notes:
- If the specified file you want to write data to does not exist, Node will create it automatically.
- The
node filename.extensioncommand still works for running a Node.js script that streams data to a file. Thenodecommand is a universal CLI tool for running all Node.js scripts regardless of their purposes.
And that’s it! This tutorial used a basic application set up to explain what Node.js is, its purpose, and how you can use it to run JavaScript programs outside a web browser. Happy coding!